From the moment you ignite that Pyre, Monster Train pulls you into a strategic dance of deck-building, tactical combat, and crucial decision-making. But what if you could twist the rules, bending the very fabric of the game to forge unique challenges or unlock elusive achievements? That's where Top Monster Train Challenge Seeds & Modifiers come into play, offering a thrilling layer of replayability and strategic depth for both seasoned Conductor and aspiring Pyre-guardian alike.
Whether you're looking to optimize your runs, chase down a specific achievement, or simply inject some fresh chaos into your journey through the rings of hell, understanding how to leverage challenge seeds and Mutators is key. This guide will arm you with the knowledge to harness these powerful tools, transforming your Monster Train experience.
At a Glance: Mastering Monster Train Challenges
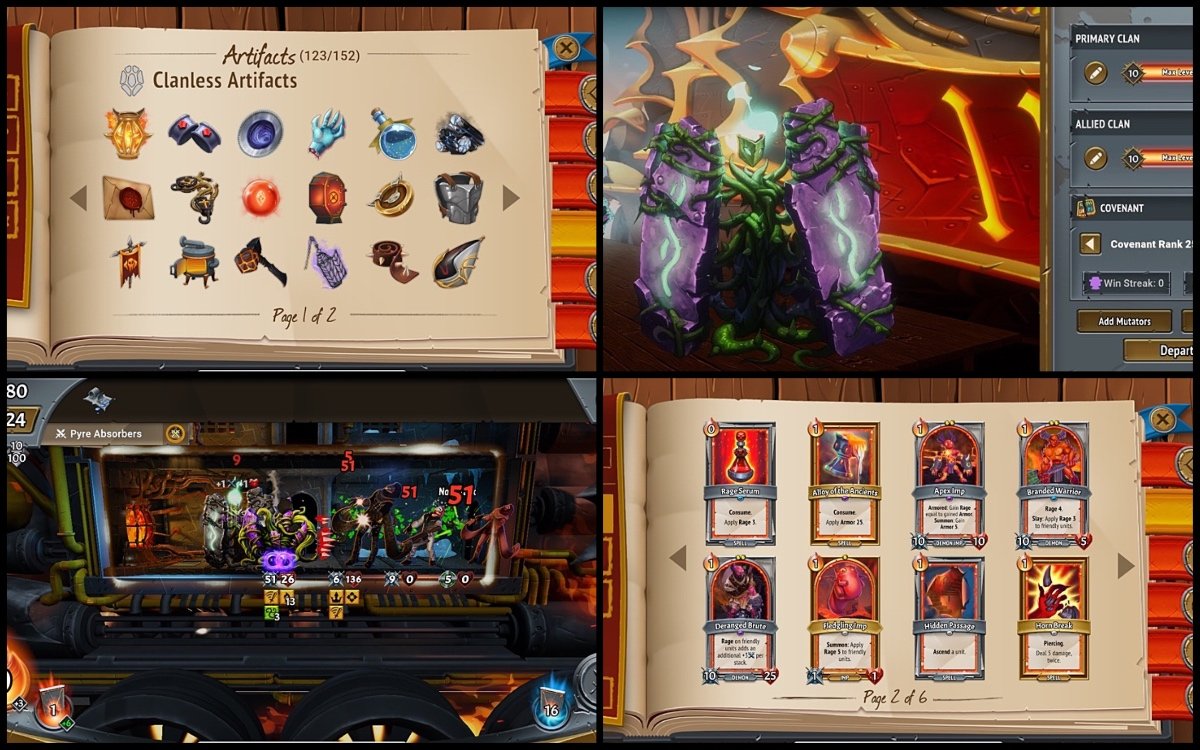
- Mutators are Gameplay Modifiers: These optional tweaks can make your run easier, harder, or simply weirder, available in Dimensional and Daily Challenges.
- Max 3 Mutators: You can activate up to three Mutators simultaneously for truly unique combinations.
- No Winstreak or Crown Impact: Experiment freely! Mutators don't affect your winstreaks or unlock logbook crowns, making them perfect for low-stakes, high-fun runs.
- Seeds for Specific Outcomes: Use specific challenge seeds to unlock rare achievements or master tricky cavern cards.
- Strategic Synergy is Key: Learn to combine Mutators that complement your chosen clan and playstyle, or use them to deliberately ramp up difficulty.
Unpacking the "Challenge": What Are Mutators and Seeds?
Before we dive into specific recommendations, let's clarify the core concepts. In Monster Train, "challenges" broadly refer to runs where the standard ruleset is altered. These alterations come in two main forms: Mutators and Challenge Seeds.
Mutators are dynamic gameplay modifiers that you can toggle on or off before starting a Dimensional or Daily Challenge. Think of them as custom rule changes – one might give all your units Quick, while another might double enemy health. They add a fascinating layer of complexity, often forcing you to adapt your entire strategy from deck construction to combat execution. While they can be a boon, making certain builds incredibly powerful, they can also be a bane, introducing severe handicaps that demand creative solutions. Remember, you can activate up to three Mutators at once, allowing for intricate strategic layering.
Challenge Seeds, on the other hand, are specific alphanumeric codes that dictate the exact generation of a run. This means the same seed will always produce the same map layout, encounters, artifacts, and card rewards, making them invaluable for practice, speedrunning, or, as we'll explore, unlocking specific achievements and mastering certain cards.
Neither Mutators nor specific seeds affect your winstreaks or allow you to unlock new "crowns" in your logbook, freeing you to experiment without fear of impacting your primary game progression. This makes the challenge system a fantastic sandbox for testing new ideas, learning obscure mechanics, or simply enjoying the game in novel ways.
Navigating the Chaos: A Deep Dive into Mutator Categories
Mutators are diverse, impacting nearly every facet of your run. To help you make sense of the options, we've categorized them and highlighted key examples, offering insights into their strategic implications.
1. Unit & Champion Modifications: Reshaping Your Fighters
These Mutators directly influence your units, from their stats and abilities to their summoning behavior. They can fundamentally alter your combat priorities.
- Fast Draw: All friendly units get Quick.
- Strategy: This is a massive boon for damage-dealers and units that need to strike immediately, like Shardtail Queen or units with Slay triggers. Stack them on the top floor and watch them melt enemies before they can react.
- Seeing Double: When the first friendly unit is summoned each turn, that same unit is summoned again.
- Strategy: Arguably one of the most powerful Mutators. It effectively doubles your unit density and can lead to insane scaling. Think about summoning a Rector Flicker to immediately duplicate another Rector, or getting two copies of a high-value unit like Apex Imp or Horned Snapper. Prioritize low-cost units and powerful "on-summon" effects.
- Big Chungus: All friendly units get +1 Attack.
- Strategy: A straightforward damage buff. Great for early game tempo and for units with Multistrike or Slay triggers, where even a small attack increase is multiplied.
- Slow and Steady: Friendly units enter with +10 Attack and Sap 7.
- Strategy: The massive attack boost is appealing, but Sap 7 means these units won't be hitting hard for long. This is fantastic for "burst" strategies on the first floor, clearing an entire wave quickly, or for units that are meant to be sacrificed anyway (e.g., Imp-centric builds) or those that can re-enter battle (e.g., using consume spells to replay them).
- Bulked Up: Enemy units have double health.
- Strategy: This flips the script, demanding far more damage output or aggressive scaling. Prioritize units with high base attack, Multistrike, or strong health-drain mechanics. Sweeping damage also becomes more important to clear out multiple beefy threats.
- Permadeath: When a non-Champion unit dies, it is purged from your deck.
- Strategy: A truly brutal Mutator. Every unit loss is permanent, forcing you to protect your units at all costs. Prioritize survivability, healing, and units that are hard to kill (e.g., high health, Armor, Regeneration). Avoid glass cannons unless you have strong ways to keep them safe. Card draw and duplicating key units also become paramount.
- Rising Retribution: Enemy units gain Spikes 3 when they move.
- Strategy: Punishes multi-lane strategies or units that push enemies around. Units with high health, Armor, or spell-based damage become more appealing. Be cautious with low-health units that strike frequently.
- Stoneform: Enemy units enter with Armor equal to 50% of their Health.
- Strategy: Directly counters direct damage strategies. Spells that apply Frostbite, Slay triggers that ignore Armor, or units with Multistrike that can chew through Armor quickly are highly favored. Avoid low-damage, single-strike units.
2. Spell & Card Modifications: Reshaping Your Hand
These Mutators alter how your spells behave, their cost, or even what's in your deck. They can drastically shift your magical strategy.
- Cheap Trick: Spells cost -1 Ember.
- Strategy: A dream for spell-heavy builds, especially Awoken or Hellhorned. Enables more powerful spell casting and easier combo generation. Prioritize expensive spells or those you want to cast multiple times per turn.
- Recurrent: All spells gain Holdover.
- Strategy: Infinite power! This means any spell you cast will return to your hand next turn. Look for spells with strong scaling (e.g., those that gain Magic Power), critical buffs, or crucial debuffs. Be mindful of Ember costs, as you'll want to cast these repeatedly.
- Zoom, Enhance: All cards have 1 additional upgrade slot.
- Strategy: Incredible for power-leveling your key cards. Focus on cards with high upgrade potential, adding multiple +25 Attack, Multistrike, or cost reduction upgrades to create true monsters.
- Money is Power: Spells gain 1 Magic Power per 100 Gold you start the turn with.
- Strategy: Encourages hoarding gold and using it for explosive spell turns. Prioritize spell damage and ways to gain extra gold. A potential combo with Moneybags.
- Arduous Arcana: Spells cost +1 Ember.
- Strategy: A severe penalty for spell-based strategies. You'll need to prioritize Ember generation, cost-reduction upgrades, or lean heavily into unit-based combat. Each spell cast becomes a significant decision.
- Chronic Pain: Add Curse of Entropy to your deck at the start of every battle.
- Strategy: This card gives your Pyre Fragile 1 on play. You'll want to purge it quickly or have strong card draw to burn through your deck. Artifacts that consume or purge cards are invaluable here.
- Volatile Spells: Spell targets are chosen randomly, and Undo is disabled.
- Strategy: Pure chaos! This is a high-risk, high-reward Mutator. Prioritize spells that hit all units (like many Hellhorned spells) or have beneficial effects even on random targets. Avoid single-target crucial buffs/debuffs unless you're feeling lucky.
3. Pyre & Combat Mechanics: Direct Battle Alterations
These Mutators directly impact how the Pyre functions or how combat effects resolve.
- Final Shard: At the start of battle, apply Fragile and Damage Shield 2 to your Pyre.
- Strategy: The Damage Shield is a nice buffer, especially against early damage, but the Fragile means any hit taken will be magnified. It's a wash; the Fragile makes it more dangerous, but the shield helps counter early ticks. Requires careful Pyre protection.
- Pyre of Glass: Your Pyre takes an additional 3 damage from all sources.
- Strategy: This is one of the most punishing Mutators. Pyre health becomes your paramount concern. You'll need extremely aggressive strategies to clear waves before they reach the Pyre, strong Pyre healing, or artifacts that protect your Pyre. Units that ascend or kill quickly are essential.
- The Floor is Lava: All units get Pyregel 5.
- Strategy: Units continuously take damage. This is a double-edged sword: it helps clear enemies but also harms your own units. Prioritize units with high health, Regeneration, or Armor. Multistrike and Quick units are key to eliminate threats before Pyregel takes its toll.
- More Damage, Less Time: Frostbite and Decay deal an extra 1 damage per stack.
- Strategy: Fantastic for builds that utilize these status effects (e.g., Melting Remnant, Umbra). It dramatically accelerates their power. Likewise, be wary if enemies start applying these to you.
4. Economy & Merchant Interactions: Gold and Resources
These Mutators change how you earn, spend, and manage your gold, directly affecting your ability to upgrade cards and units.
- Moneybags: Double Gold.
- Strategy: An incredible boon. This allows for extensive upgrades, merchant purchases, and rerolls. You can comfortably build a truly optimized deck, buying out shops and forging multiple cards.
- Gilded Skip: The Skip option in drafts grants 50 Gold.
- Strategy: Rewards thoughtful skips. If a draft offers nothing useful, skipping provides valuable gold. This encourages more selective deck-building and can be combined with Moneybags for even more financial power.
- Buying Power: Merchants provide a card duplication service.
- Strategy: Extremely powerful, allowing you to copy your best units or spells. Imagine duplicating a fully upgraded champion or a critical scaling card. Prioritize finding your key cards early to maximize duplication potential.
- Empty Pockets: No longer gain card packs from non-Flying Boss battles.
- Strategy: Limits your card acquisition significantly, forcing you to rely more on merchant purchases, specific card rewards, or starting deck synergy. Every draft choice becomes more critical.
- Bleeding Cash: Lose 1 Gold whenever a friendly unit takes damage.
- Strategy: Punishes aggressive blocking or tanking strategies. You'll need to minimize unit damage taken, prioritize units with high health/Armor, or simply clear enemies before they can strike.
- Paid in Blood: Take 4 Pyre damage when purchasing any merchant option.
- Strategy: A painful trade-off for upgrades. Each purchase risks Pyre health, forcing you to weigh upgrades against survival. Pyre healing becomes more valuable, or you might choose to skip some upgrades to save your Pyre.
5. Deck & Starting Conditions: Your Initial Setup
These Mutators alter your initial deck, starting artifacts, or setup, influencing your early game strategy.
- Perma Scaling: Start with Blood of the Apex and Advanced Growth.
- Strategy: A fantastic head start for scaling builds. Blood of the Apex makes your units grow stronger with each kill, and Advanced Growth applies Rage 2 to your frontmost unit. Great for single-unit scaling champions or clans like Umbra.
- Team Up: Gain the Champion of the allied clan; it gains a random upgrade and levels up after each flying boss.
- Strategy: Effectively gives you two champions to level up, dramatically increasing your power curve. This is a huge advantage, allowing for diverse strategies and stronger unit presence.
- It's Free Real Estate: Room cards cost 0; add 2 random Room cards to your starting deck.
- Strategy: Encourages the use of these powerful but often niche cards. Getting two for free and zero cost is a massive boost, especially if you get good ones like Forever Flame or Shard of the Pyre.
- Heavy Burden: Units cost 1 more Ember.
- Strategy: Similar to Arduous Arcana but for units. Ember generation becomes crucial. You'll need efficient units, cost reduction upgrades, or a strong plan for managing limited Ember.
- Yeetpocalypse: You must purge two cards after every battle.
- Strategy: Forces aggressive deck thinning. This can be a boon if you want a super-lean, focused deck, but it can be devastating if you accidentally purge critical cards. Prioritize cards you want to keep, or those that can be consumed/purged intentionally.
6. Map & Challenge Flow: How the Run Unfolds
These Mutators change how you navigate the map, the types of events you encounter, or the structure of battles.
- Our Powers Combined: Drafts can have cards from any clan.
- Strategy: Unlocks incredible cross-clan synergies. You can pick the best cards from any clan, creating truly unique and powerful combinations. Experiment with unusual pairings!
- Gear Up: A Merchant of Arms appears in the middle of the tracks after the first battle.
- Strategy: Early access to powerful unit upgrades. This allows you to supercharge your primary unit or champion much faster, snowballing your power.
- Return on Investment: Spawn an additional Collector in battles that already have a Collector.
- Strategy: More gold! Collectors drop gold, so having an extra one means richer runs. Great for combination with Moneybags or for purchasing more upgrades.
- One Track Mind: The path you take on the map is chosen automatically.
- Strategy: Removes player choice from map navigation. This means you can't strategically plan for specific merchants or events, adding a layer of randomness. Adaptability is key.
- Wave Shuffle: Enemy waves before A Brief Respite will be randomized; battles have additional enemies.
- Strategy: Increases unpredictability and overall difficulty. You'll face more enemies and less predictable compositions early on, demanding versatile decks that can handle various threats.
Crafting Your Edge: Strategic Approaches to Mutator Combinations
The real magic of Monster Train challenges lies in combining Mutators. You can create synergistic pairings that amplify certain strategies, or deliberately choose opposing Mutators for an ultra-difficult run.
- Synergy Focus: Look for Mutators that feed into each other. For example:
- Moneybags + Money is Power: Double gold for massively powerful spells.
- Seeing Double + Fast Draw: Duplicate Quick units for immediate, overwhelming pressure.
- Recurrent + Cheap Trick: Spells cost less and return to hand, enabling infinite combos.
- Counterplay Focus: Some Mutators are incredibly difficult. Consider combining them with beneficial ones that specifically mitigate their negative effects:
- Pyre of Glass + Team Up: Having two champions means more combat power to clear waves faster, protecting your fragile Pyre.
- Bulked Up + Perma Scaling: Enemies have more health, but your units gain damage every kill, helping you eventually overcome their bulk.
- Difficulty Scaling: Want a brutal test?
- Combine Pyre of Glass (Pyre takes +3 damage) with Bulked Up (enemies double health) and Heavy Burden (units cost +1 Ember). This forces extreme efficiency, fast scaling, and impeccable Pyre protection.
- For a truly unique experience, consider how your strategy might evolve when you want to generate your own Monster Train 2 challenges with custom modifiers. This allows you to fine-tune the difficulty and play experience to your exact preferences.
Unlocking Secrets: Top Challenge Seeds for Achievements & Mastered Cards
Beyond general difficulty, specific seeds are your key to unlocking some of Monster Train's most elusive achievements and mastering rare cavern cards. These seeds offer a consistent path to specific events, removing the luck factor.
The "Stop! Thief!" Achievement
This achievement requires you to steal treasure chests from a cavern event, but not just any steal. It specifically involves using the rare Petty Theft card.
- Goal: Successfully steal both treasure chests from a cavern event.
- Normal Outcome: Without Petty Theft, you typically choose between taking a small amount of Pyre damage for some gold, or a large amount of damage for more gold.
- Method with Seed: The trick is to acquire the Petty Theft card from an earlier cavern event. When you encounter a later treasure cavern, having Petty Theft in your deck allows you to purge it to acquire both chests for free, triggering the achievement.
- The Seed:
monstertrain://challenge/SolutionSeattleStreets - How to Use: Enter this seed in the Custom Challenge menu. This seed is specifically designed to hit every cavern, maximizing your chances to find Petty Theft early and then encounter a treasure chest cavern where you can use it. Be diligent about visiting all cavern nodes on the map.
The "It's a Secret.." Achievement
This achievement involves a specific interaction with a set of unique purge cards and a hidden artifact. It's also an excellent way to master the associated cards.
- Goal: Trigger a specific outcome from a cavern event offering Most Blessed Sword, Thy Holiest Shield, or Petrified Skull.
- Method with Seed:
- Encounter the Cavern: This seed will lead you to a specific cavern event offering a choice between Most Blessed Sword, Thy Holiest Shield, or Petrified Skull. All three of these are powerful cards that initially have the "Purge" status.
- Make Your Choice: Select any one of these cards.
- The Secret: The key is to avoid playing the chosen card while it has the "Purge" status. Simply hold onto it in your deck.
- Wait It Out: After a few subsequent fights (usually 2-3), a new event will trigger. This event will grant you the Hope for Peace artifact.
- Artifact Effect: Hope for Peace changes all "Purge" cards in your deck to "Consume" instead. This not only allows you to play your chosen "blessed" card multiple times per combat, but it also triggers the "It's a Secret.." achievement.
- The Seed:
monstertrain://challenge/MartinTaylorSpent - Why this seed is useful: This seed specifically facilitates getting the event and then allowing you to master all three associated cards across different runs, as you can repeat the process choosing a different card each time.
Mastering "Automatic Railspike" and "Spikedriver Colony"
These cards are tied to a specific map interaction: visiting all caverns on a run. While not an "achievement" in the traditional sense, mastering these cards can be challenging due to their acquisition method.
- Acquisition: Both Automatic Railspike and Spikedriver Colony are awarded as a bonus if you manage to visit every single cavern on a particular run. This requires careful pathing and a bit of luck with map generation, as some paths might make it impossible.
- The Seed:
monstertrain://challenge/BargainPlateAntiques - Why this seed is useful: This seed is known for being a relatively easy Covenant 1 run where visiting all caverns is feasible. It's a great starting point for those looking to collect these specific cards without the added pressure of higher Covenant levels or overly punitive challenges. Focus on prioritizing cavern routes and maintaining a strong enough deck to survive the extra encounters.
The Elusive "Bone Dog's Favor" Card
Unlike the others, Bone Dog's Favor does not have a widely known specific seed for guaranteed acquisition.
- Acquisition: This unique card is randomly awarded from the "Abandoned Train" cavern event. This means finding it is a matter of luck and persistence across multiple runs. There's no specific challenge seed that reliably ensures this particular cavern event appears or awards the card.
- Strategy: To maximize your chances, simply prioritize visiting as many cavern events as possible in your standard runs. Eventually, the RNG will smile upon you.
Beyond the Preset: Generating Your Own Optimal Challenges
While specific seeds are excellent for targeted goals, a significant part of Monster Train's enduring appeal comes from crafting your own challenges. By carefully selecting Mutators, you can:
- Test Specific Synergies: Wonder how a particular unit scales with "Seeing Double" and "Zoom, Enhance"? Combine them and find out.
- Practice Under Pressure: If you struggle with Pyre defense, load up "Pyre of Glass" and "The Floor is Lava" to force yourself to adapt.
- Enjoy Pure Chaos: Stack three wildly incompatible Mutators and embrace the unpredictable, often hilarious, outcomes.
- Train for Specific Clans: Choose Mutators that enhance or punish a clan's core mechanics to deepen your understanding of their strengths and weaknesses.
The flexibility of the Mutator system means the possibilities are nearly endless. Each combination offers a fresh puzzle, forcing you to rethink established strategies and explore new horizons. The game offers robust tools for players to create custom scenarios, allowing you to fine-tune the parameters for truly personalized trials. You might even find it useful to explore how to effectively generate your own Monster Train 2 challenges to experiment with various modifiers and settings, pushing the boundaries of what you thought possible.
Final Thoughts: Master the Rails, Master the Blight
Monster Train's challenge seeds and Mutators are more than just optional extras; they're integral to the game's longevity and depth. They transform each run into a unique narrative, a strategic puzzle, or a quest for a hidden secret. By understanding how these modifiers work and how to leverage specific seeds, you're not just playing Monster Train – you're mastering its very essence.
So, next time you're about to embark on a run, consider stepping off the beaten path. Dive into the custom challenges, punch in a seed, or mix and match Mutators. You might just discover your new favorite way to conquer the rings of hell, one cleverly modified run at a time. The Blight won't know what hit it.